With the upcoming release of Windows 7, the question is raised again on whether you should install the 32-bit version (x86) of the operating system or move up to 64-bit (x64).

This is something that's been asked since the introduction of consumer-level processors bearing the “x64” nomenclature. It feels like just yesterday that Intel and AMD fanboys were at odds over the Athlon 64. At that time and even as recently as the introduction of Windows Vista, software and drivers for 64-bit setups were slim-pickings.
Analogous to the shift from 16 to 32-bit computing, the jump to 64-bit has been a slow one. Windows XP x64 never took off, though 64-bit versions of Vista did, thankfully. The ride was a bumpy one, but hardware manufacturers and software developers alike have finally widely adopted the 64-bit architecture - and there’s no turning back now.
At this point in time, nearly everyone is on the same page about the transition. If your old video card and printer have yet to receive 64-bit compatible drivers, odds are they won’t be getting any. A boatload of legacy hardware support was dropped with Windows Vista, and Windows 7 certainly won’t pick it back up, regardless of which version you install.
Now, you’re probably wondering why 64-bit operating systems are being phased in and what benefits they deliver over their 32-bit predecessors – both legitimate questions. One of the most commonly cited differences is that the 32-bit architecture has a memory access limit of 4GB (2^32 bytes). This permits you to use about 2.75-3.5GB of RAM after IO reservations are factored in.
On paper, the 64-bit architecture can address 16 exabytes of memory (2^64), or more than 4 billion times that of its precursor. Consumer editions of Windows Vista permit from 8GB to 128GB of physical memory to be accessed, depending on the version. Windows 7 bumps that up to 192GB with the Professional version and above.
Other benefits of running a 64-bit OS include enhanced security with hardware-backed DEP, Kernel Patch Protection and mandatory driver signing.
This is all just scratching the surface, but I suppose the real question should be:
Why shouldn’t you install Windows x64?
The short answer is that you should go with Windows 7 64-bit unless you’re running a system well into its antiquity where driver support is going to become an issue.
Microsoft has useful online tools that can scan your system and external peripherals and give you an outlook of what's currently supported and what's not. A few useful links:
- Windows Vista Compatibility Center
- Windows 7 Compatibility Center (not yet available)
- Windows 7 Upgrade Advisor

Did you know?
Retail versions of Windows 7 will include both 32-bit & 64-bit discs on the box in case you are undecided or prefer to make the jump to the 64-bit version of the OS at a later time.

Windows 8 Tricks, Tips and Shortcuts
 by- vivek bhardwaj

Windows 8 Consumer Preview cracked 1 million downloads shortly after launching last Wednesday and I'm sure many of you have tried it already. Whether you went with a dual-boot, upgrade, clean install or virtual machine, if you're coming from Windows 7 you'll notice significant changes immediately, while others may not be as obvious.
Inevitably, with change comes good and bad -- at least until you learn some tricks that get you back up to speed. I know I've been hitting my head against the wall when things don't behave the way they used to. The Start menu's absence is a perfect example of a radical change. Indeed, the duality of the OS may bring some trouble, but as skeptical as I was, I must admit Microsoft has done a pretty good job of easing many of my concerns.
Metro is undoubtedly very touch-oriented and perhaps a beginner's dream come true. For experienced users, it seems like Windows 8 still holds some promise. The devil is in the details, they say, so besides experimenting with a clean install I tried the upgrade option to see how well it worked. Going from a year-old Windows 7 install to the Consumer Preview was as seamless as you could ask for.
File copy dialogs, the task manager and search look better and work faster, and that adds up for an improved experience. I'm not loving Metro on my desktop since there's little I can currently do with the stock apps, but I wonder if that will be true once my most-used programs take full advantage of live tiles.
Without further ado, here's a shortlist of Windows 8 shortcuts and useful quick tricks I've gathered thus far.
Hot corners
The Start menu is no longer there, but there's a hot corner that makes up for it (unfortunately on multiple screens it's somewhat of a pain to use).
  • Lower-left corner + Left click Goes to the Start screen (Metro).
  • Lower-left corner + Right click Power user shortcut menu (Device Manager, Control Panel, Command Prompt, Power Options, etc.).
  • Upper-left corner Shows open window thumbnails, click to switch between them.
  • Upper screen limit + Click & Drag on desktop Move to left or right to snap the current desktop or Metro app to one side of the screen.
  • Lower-right corner Windows 8 Charm menu or Windows Aero Peak.
  • Upper-right corner Shows Windows 8 charm menu.

Left or right click on the lower-left corner and you'll be surprised with
a useful Windows orb replacement.
Keyboard shortcuts
Windows 8 is very hotkey-heavy, here are some of the shortcuts I find most useful:
  • Windows key Shows the new Start screen (Metro).
  • Win + type keyword Instant application search (same as in Windows 7).
  • Win + D Standard Windows desktop. Also minimizes/restores all open windows in desktop mode.
  • Win + Q Shows all installed apps.
  • Win + W Instant search for settings.
  • Win + F Instant search for files.
  • Win + I Settings sidebar (control panel, network, volume, brightness, notifications, and more).
  • Win + P Shows multi-monitor options, also useful for connecting an external monitor or projector.
  • Win + X Power user shortcut menu (Device Manager, Control Panel, Command Prompt, Power Options, etc.).
  • Win + Z Shows App Bar in Metro applications.
  • Win + . (period) Snaps the current Metro app to the right side of the screen. Do it twice and it will snap to the left.
  • Win + . (period) + Shift Snaps the current Metro app to the left side of the screen.
  • Win + J Switches focus between snapped Metro apps.
  • Win + Page Up / Down Moves full-screen Metro app to secondary monitor.
  • Win + Left / Right arrow Moves and snaps desktop applications in that direction, or to a different monitor.
  • Win + Tab Switches between open applications. Similar to using the left-upper hot corner with a mouse.
  • Win + L Locks Windows.

You can snap Metro apps or your desktop to the side and continue working on the center of the screen.
Another shortcut lets you switch focus between the two.

Showing all apps at once (Windows Phone style) and searching with a few keystrokes is
the Windows 8 equivalent to the old Programs menu.
Get the Start Menu back, orb and all!
Following user posts in our previous Windows 8 articles, I've seen some of you wanting to completely get rid of Metro and get the Windows 7 orb back. If that's the case I'd personally recommend you just stick to Windows 7, but if you already jumped ship there's a trick to do so as discussed on AskVG.
Updated: A second, improved alternative The clever folks at Stardock have released a piece of software called Start 8 that essentially adds a Start button to Windows 8's desktop mode. When you click on it you get a Metro-esque Start menu from where you can search and access other settings.
Remove that pesky wallpaper watermark
As we've seen on older betas, Windows 8 CP shows a wallpaper watermark indicating it's not a final build. The lock screen or Metro UI don't have any similar nagging reminder, and spending a majority of my time in the desktop mode, the message is tacky to say the least. Here's a solution I found circulating on a few forums:
  • Download this zip file and install the InstallTakeOwnership.reg registry file
  • Take Ownership from the shell32.dll.mui file located on C:WindowsSystem32en-US
  • Take Ownership from the basebrd.dll.mui file located on C:WindowsBrandingBasebrden-US
  • Copy and replace the shell32.dll.mui from the Edited Files to C:WindowsSystem32en-US
  • Copy and replace the basebrd.dll.mui from the Edited Files to C:WindowsBrandingBasebrden-US
  • Close the Windows Explorer window and open the Command Prompt with Administrator rights (remember that Win + X shortcut?)
  • Type mcbuilder, wait for it to finish and reboot.
Other quick tips
  • Drivers Windows 8 won't suffer the same fate Vista did with drivers. Most Windows 7 drivers will work just fine with the new OS. Nvidia advised GeForce owners to use the readily available 295.73 driver set, while AMD decided to release new Radeon drivers for the Consumer Preview.
  • Recalling storage space after setup Your mileage may vary with a Windows 7 upgrade. It worked great for me but remember this is still beta software. Anyway, if you upgraded you may want to restore files from the Windows.old directory which contains data from your older OS installation and other files used during the setup using the Disk Cleanup tool. Reminder #2: If you upgrade, you can't revert back to Windows 7.

You can recover a few gigabytes worth of storage space if you
clean up after a Windows 8 upgrade.
  • Upgrading to Windows 8 Windows 8 will offer a complete upgrade option from Windows 7, but the same won't be possible if you are using Vista or XP (or the current Consumer Preview for that matter). System requirements for Windows 8 are essentially the same as Windows 7 (which were similar to Vista), so most semi-modern hardware will run it just fine.
  • Metro notifications, turning some of those off Windows 8 encourages you to use a Microsoft account so you can take advantage of neat features like SkyDrive or syncing your OS settings across multiple PCs. However, it will also activate other things like the Messaging Metro app, which looks good, but becomes a nag if you are using a different IM client like Trillian or Pidgin. Windows 8 uses notifications that resembles those of Growl on OS X. You can fully manage, and deactivate the Messenger app notifications from the Settings menu.

Windows 8's notifications look good and serve a purpose, but you may want to be
selective about the programs that can interrupt your workflow.
  • Native screenshots in Win 8 Although using a third-party tool like Droplr remains the easiest way to grab and share a screenshot, Windows 8 finally adds a screenshot shortcut that doesn't require the snipping tool or another program where you can paste the taken image. Win + Prt Sc does the trick, saving a PNG image file on the Pictures folder.
That's it for now. Did we miss anything important? Have a Windows 8 how-to question? Let us know in the comments and we'll do our best to come up with a solution.


Computer Tips & Tricks Everyone Should KnowMany hardcore computer users might think themselves above learning new tricks, but there's always new things to learn that will help improve your skills. Our bet: you will find at least one useful thing here that you didn't know before.
Inspired and with the help of this AskReddit discussion, we’ve compiled some of the most handy computer tricks you might not be taking advantage of. Our ultimate goal is to help you become more productive by shaving valuable seconds off your workflow. Of course, you can always pass along these tips to your not-so-savvy friends and family members to help them become better PC users as well.

General Tricks

Windows hidden "god mode" folder Windows offers a centralized Control Panel for all of the OS settings, which makes it easy for users to tweak everything from desktop background to setting up a VPN. To enter this mode, create a new folder with this exact name (copy and paste it): God Mode.{ED7BA470-8E54-465E-825C-99712043E01C}. The folder icon will change to a Control Panel-style icon, and you will be able to jump in and change all kinds of settings. Note: Don't try this on Windows Vista 64-bit as it's known to cause a reboot loop.

Use Problem Steps Recorder This handy tool automatically records any mouse clicks and takes screenshots for you. If you need tech assistance with your computer, go to Run by typing Windows + R, and then type "psr." Use the tool and by the time you are finished, you can send this information, neatly compiled automatically, to the person helping you with the issue. It will make the process of finding the problem much easier for them, which means you will be able to get your system up and running faster.
Find/Delete large files wasting space A handy tool called WinDirStat (Windows Directory Statistics) can be used to easily find which files and folders are taking up the most space on your drive. From there, you can delete them and open up a ton of storage space.

Reduce the number of programs running at startup If your PC is taking too long to boot, it’s probably because you have far too many programs running at startup. Reducing this is easy, it will make your PC launch noticeably faster and lighter upon first load. To change the items running at startup, go to Run using the hotkey Windows key + R, and type "msconfig." A small window will appear (see the screenshot below), select the Startup tab. From here you will be able to turn off many startup programs, which can shave several seconds (or minutes) off your boot time. (Note Windows 8 has moved this functionality to the Task Manager). Try to make sure you research what you are turning off as some processes might be needed by third party programs or drivers you have installed.

Cloud backup important files If you’re working on a critical paper for school, work, or any other major project, make sure you are backing up the file not just locally. You can use services like Dropbox, Google Drive, or any of the other popular cloud storage solution which will do the legwork for you on the background. Of course, you can also throw the files on a thumb drive or external HDD just to be safe but backing up to the cloud can be done seamlessly which is twice the advantage.

Typing Tricks

Delete an entire word Instead of deleting a single letter, pressing CTRL + BKSP will delete the entire word behind the cursor. This makes deleting text quicker if you screw up a whole word.
Move Cursor to beginning of the next or previous word Moving the cursor around manually while typing is a great way to make your work take longer than it needs to. To speed of the process, move the cursor around with keyboard shortcuts. To move it to the beginning of the previous word, use CTRL + Left Arrow. To move it to the beginning of the next word, use CTRL + Right Arrow. In OS X you can accomplish the same using the Option key.
Making sub and superscript text If you need to make sub or superscript text (think exponents for superscript), press CTRL + = for subscript and CTRL + SHIFT + = for superscript.
Paste plain text of what was copied When you copy text from any source, programs will usually copy any formatting that comes with it. To paste this as plain text, press CTRL + Shift + V instead of the standard CTRL + V, and the system will paste unformatted text.
Note that many programs follow this parameter (Chrome, Firefox, etc.) but not all, particularly Microsoft programs like Word or Outlook. For those there's a few alternatives that go beyond copying and pasting in Notepad: 1) CTRL + ALT + V will show a 'paste special' dialog box. 2) CTRL + Spacebar will remove formatting in already pasted text. 3) Download Puretext and choose a hotkey to always paste plain text with it.

Keyboard Shortcuts

Copy only active window to clipboard Normally, the Print Screen key copies the entire display (or two displays if you got them), ALT + Print Screen only copies the currently active window to the clipboard. Whether taking a screenshot to diagnose a problem, or just because you want to show something to a friend, this will come in handy.
Fix those little mistakes Did you know you can undo almost any action? CTRL + Z is the ultimate hot key, and for sure you knew about it already, however note that undo doesn’t just apply to typing. If you accidentally delete or move a file, you can hit CTRL + Z to bring it right back to where it was. In Chrome and Firefox you can also undo closing a tab using CTRL + SHIFT + T.
Cycle through open windows Pressing ALT+TAB allows you to cycle through currently open windows. This makes switching back and forth between running processes quick and painless. If you want a more stylish method of cycling through open programs, Windows + TAB will do the job for you.
Interrupt all processes CTRL + ALT + Delete is one of the most common PC shortcuts, and one almost everyone is familiar with. The important thing to note is that it interrupts all processes, including the one that is bogging down your system, which can mean the difference between needing to restart or not.

Close the current program Typing ALT + F4 will close the program that is running. This is useful as it saves you time mousing over the "X" and clicking. People will often use this as a joke, telling you to press ALT + F4 to fix a problem. Don’t fall for it unless you want to close what you are doing.
Minimize all windows Sometimes you have a bunch of stuff running, and you want it all to go away so you can get to the desktop. Simply pressing Windows + D will minimize everything you have up, which will save you some time pressing the minimize button for each window. It should be noted that Windows + M offers similar functionality, but there is no undoing, so Windows + D is the more favorable approach.
Open the task manager directly If you want to bypass the interrupt that happens when pressing CTRL + ALT + DEL and jump right to the task manager, typing CTRL + Shift + ESC launches it directly.
Close the current window/tab Stick of moving all the way to that X button? Press CTRL + W and the current window will close. (Don’t do it now, or you will miss the rest of the tricks!)
Bring up the system information window This is so much quicker than digging this out the traditional way... Just press Windows + Pause/Break and the System Information panel will be ready to go. This might be the only use for the Pause/Break key you will ever find, so enjoy it!

Better multiple monitor control There are several useful keyboard shortcuts for controlling open windows on multiple monitors. Pressing the Windows Key + Arrow Keys will cause a window to quickly snap to each side of either monitor. Alternatively, hitting Shift + Windows Key + Arrows will cause the window to jump to the other monitor. Lastly, pressing Windows + P will allow you to quickly set up a second display or projector.

Web Browsing Tricks

Automatically add www. and .com to a URL You can shave off a couple of seconds typing in a URL by simply click CTRL + Enter after you type the name of the site. Need .net instead of .com, press CTRL + Shift + Enter instead.

Jump to address bar There are a number of ways to jump right to the address bar from anywhere in browser. Pressing CTRL + L, F6, and ALT + D all accomplish this goal.
Bring back a closed tab We covered this already, but it's super useful. Accidentally closed a tab? Simply press CTRL + Shift + T to reopen the most recently closed tab and get back to what you were doing.
Use private browsing The uses for not having cookies and history saved are obvious for certain activities, you know, like shopping for gifts on a shared computer (of course!). Pressing CTRL + Shift + N will launch a new private in Chrome, CTRL + Shift + P will do it in Firefox and Internet Explorer.

Cycle through open tabs Pressing CTRL + TAB while in a browser will flip between each one. This can be much faster than moving the mouse and clicking on a tab. CTRL + NUM (1, 2, 3, 4, n..) will also take you to certain tab in that numeric order.

File Management Tricks

Rename a file quickly Right-clicking and selecting rename is not very efficient. Instead, simply press F2 while a file is selected to change its name. To alter the name of another file, type TAB without deselecting the current file.
Rename files sequentially in Windows You actually don’t need to download any programs to perform a batch file rename in Windows. Instead, you can select all the files you want to change, right-click the first one in the list, select rename (or use F2), and type in the name. This will automatically change all the other files with the same root name with a suffix: (1), (2), and so on.

Select multiple files using the keyboard To select a bunch of files using your keyboard, you can press Shift + down arrow to select a single file or Shift + Page Down to select a large group of files at one time.

Security Tips

Run programs on an infected PC Often times, malware will prevent a computer from running certain programs. Changing the name of the .exe file can often override this. If that doesn’t work, changing the extension to .com is another useful alternative, and the program will still be able to run in spite of the extension change.
Read installers Even major programs can install toolbars and other unwanted pieces of software during installation. Take a few seconds to read each step to make sure you are not agreeing to install something other than the program you were actually seeking. Far too often people just push next over and over, and end up with a browser covered in various search bars that just aren't needed. In the worst of scenarios, these can have nefarious intentions.
Lock your computer if you get up Sick of your "friends" going onto your computer at work or home and posting things on your Facebook/Twitter page on your behalf? It’s certainly an annoyance, but an easy one to prevent. Windows + L will lock your system right away, requiring a password (if you've set one) to log in again.

Program-Specific Tricks

Photoshop: Drag the marquee without losing the ability to size it The marquee tool is, at its most basic level, designed for selecting a part of an image. It’s used constantly in Photoshop, and there is a handy trick many users miss. While dragging it around, you can press space, which will allow you to size it while moving it. This saves time by letting your perform two key functions at the same time.
Steam: Move games to another drive or partition By default, Steam installs all games to the same HDD or partition, but what happens if that fills up? The solution: download Steamtool Library Manager. It makes it easy to move games to another hard drive without messing with the functionality of Steam.

VLC: Fix unsynced audio and subtitles In the popular media player VLC, if your audio loses sync with the video or subtitles, there is an easy way to fix this. Simply pressing J or K will move the audio forward or backwards. Similarly, to sync the subtitles you can press H or G.

The combination of using these tips and tricks on a daily basis will most certainly make your computer life much more enjoyable, or at least more practical. And so, did you learn a thing or two that you didn't know before?

Check If Someone Is Using Your Wi-Fi...

Posted by Unknown 02:32
Check If Someone Is Using Your Wi-Fi
 
There are many reasons why you'd want to check if an unauthorized party is using your wireless network. It may be that you're experiencing a slower than normal Internet connection or you simply don't want anyone getting a free ride while you pay the bill. Of course, there are also security implications if this person can somehow access files on your network, and even legal implications if he uses your connection for piracy or other illicit activities.
Whatever the case it's better to stay on the safe side. Many of you may have already taken some basic precautions when setting up your wireless network and know your way around troubleshooting these issues. This brief guide is aimed mostly at novice users in need a hand to find out if, indeed, their Wi-Fi is being stolen.

Check the devices associated with your router The first thing you need to do is login to your router's administrative console by typing its IP address directly into the browser address bar -- typically 192.168.0.1 or 192.168.1.1 depending on which router you have. If you don't know your router's default address check out this guide or simply go to the command prompt (Start > Run/Search for cmd) and enter ipconfig. The address you need should be next to Default Gateway under your Local Area Connection.
Alternatively, if you are on a Mac, you can find the default address by going to Network under System Preferences. It should be listed right next to "Router:" if you are using Ethernet, or by clicking on "Advanced…" and heading to the "TCP/IP" tab if you are using Wi-Fi. Next, point your browser to that address and enter your login details -- if you haven't changed the default settings it should be a combination of "admin" and "password" or blank fields. Here's a default username and password list (PDF) you might find useful, but we recommend you change this afterwards.
Once inside your router's administrative console look for a section related to connected devices or wireless status. In my old DIR-655 from D-Link it's available under Status > Wireless but you'll find it as "Attached Devices" in Netgear routers, under DHCP Clients Table on Linksys routers, "Device List" if you are using the Tomato firmware, and so on.

DHCP client list examples on D-Link and Linksys routers.
This should provide a table with the IP, MAC address and other details of every device currently connected to the router. Check that list against your gear to find any intruders. You can find out the MAC/IP address of your computers by going to the Command Prompt again and entering 'ipconfig /all'. The MAC address will be shown as the physical address. I'll let you figure it out for mobile devices like smartphones and media players since I can't possibly list all options.

Taking action The best and simplest solution is to set up a strong password using WPA2 or WPA -- WEP is very easy to crack so avoid that if possible. There are some other methods you can use to beef up security, like switching off the SSID broadcast (which prevents it from advertising the name of your network to nearby Wi-Fi devices) or setup a filter for allowed or blocked devices by MAC address. It won't stop the most determined intruder but it will slow him down.
That should be more than enough for most users but if you need to actually track down who's been breaking into your network it's possible to pinpoint his physical location using a tool called MoocherHunter. You'll need to burn a Live CD to boot your laptop with and walk around to track down unauthorized wireless clients. According to the program's description, it detects traffic sent across the network and can find the source within 2 meters accuracy.
Needless to say, we're not suggesting you take matters into your own hands, but it might come in handy if someone is getting you in trouble with authorities using your network for illegal purposes -- or simply to have a cool story to tell.
With a vibrant 7-inch IPS display and a 1GHz dual-core processor, the $199 Kindle Fire can make for one lovely tablet. With a bit of work--but no hardware modifications--you can set up Android 4.0 on your Kindle Fire and thenceforth use the device as a powerful general-purpose tablet despite its incredibly low price. Email, games, Web browsing (with Chrome for Android or any other browser)--the Kindle Fire can do it all.
This guide is directly based on the excellent guide written by XDA Developers user Kinfauns. Kinfauns's guide and his Kindle Fire for Beginners guide are highly recommended reading, but they're fairly lengthy. We've simplified the process and then tested it ourselves, so we can walk you through all of steps; but please use caution when tinkering with your gear, and understand that PCWorld accepts no responsibility for the consequences. That said, read on for a quick step-by-step procedure that you can follow to transform your Kindle Fire into an Android 4.0 tablet!

Ingredients

You will need:
  • A Kindle Fire with a full battery (if it's not full, take time to recharge it fully).
  • A USB cable for connecting the Kindle Fire to your computer.
  • A Windows computer that you have Administrator rights for.
  • fbmode by XDA Developers user Pokey9000.
  • The FIREFIREFIRE bootloader for Kindle Fire.
  • The TeamWin Recovery image, also known as TWRP.
  • The Kindle Fire Utility, a third-party toolkit that simplifies many tasks and includes vital drivers.
  • An ICS (Android 4.0) ROM for the Kindle Fire. You can pick one from this list of ROMs. For this wow-to, we'll be using AOKP, a well-regarded third-party ROM. The latest AOKP version at the time of this writing is build 38, but it's a good idea to check for the most recent version.
  • [Optional] The Google Apps bundle, including Gmail, Google Play, and other essential Android apps. This is packaged separately from the ROM for legal reasons. If you download AOKP, you can find Google Apps for AOKP release 38, under GApps (the last link on the page).
  • A willingness to void your warranty and to use the Windows command line. This how-to does not use graphical tools.

Install the Kindle Fire Drivers

For this procedure to work, your computer must correctly recognize the Kindle Fire as an Android device. Here's how to make that happen:
1. If your Kindle Fire is connected to your computer, unplug it.
2. The KFU zip contains a folder called Kindle Fire Utility. Unzip the contents of this folder into a new folder, c:\kfu.
3. Run the install_drivers.bat file that's in the c:\kfu folder. Windows will pop up a UAC prompt, and then start the Kindle Fire Driver Installer.
4. As you step through the installer, you'll receive a Windows Security alert warning you that the drivers are not signed. Install the drivers anyway.
5. The installer should complete successfully and show a confirmation dialog with the driver name:
Kindle Fire driver installation confirmation.

Verify That the Drivers Were Successfully Installed

Before doing anything risky with your Kindle Fire, make sure that your PC fully recognizes it as an Android device:
1. Connect the Kindle Fire to your computer and wait for a few moments while Windows recognizes it (even if you've plugged it in before).
2. Run Device Manager (Click Start, right-click My Computer, and then select Manage > Device Manager).
3. You should see the Kindle Fire registered as an Android Composite ADB Interface, under Android Phone in the Device Manager tree.
If you see this listing, you're good to go. If this isn't exactly what you see, you'll need to do some troubleshooting; for that, refer to the original guide which has an extended troubleshooting section under the heading "What can I do if the drivers won't load?"


Switch to Fastboot Mode

It's still not too late to turn back. Up until this point, you haven't done anything to the Kindle itself. But now you're about to take the first step that involves making changes to the tablet. So, without further ado:
1. Make sure that the Kindle Fire is still connected to your computer.
2. Create a new subfolder, c:\kfu\software.
3. Unzip fbmode.zip into c:\kfu\software. It contains a single file, called fbmode (with no suffix).
4. Open a command prompt window, and copy fbmode into a user-writable location on the Kindle Fire using ADB:
adb push C:\kfu\software\fbmode /data/local/tmp/
5. Edit fbmode's permissions so that it can run:
adb shell chmod 755 /data/local/tmp/fbmode
6. Run fbmode to switch to fastboot mode:
adb shell /data/local/tmp/fbmode
7. Using ADB, reboot the Kindle Fire:
adb reboot
At the end of this process, your command prompt window should look like this:
Command prompt window after switch to fastboot mode.
Your Device Manager should look like this:
Kindle Fire listing in Device Manager after switch to fastboot mode.


The meaning of this notation is that the name of the device changes from Android Composite ADB Interface to Android ADB Interface.
Finally, the Kindle Fire itself should look like this:

Kindle Fire screen after switch to fastboot mode.
The Fire will simply display a logo and stay put. It's not "stuck"; rather, it's in fastboot mode, awaiting further instructions.

Install a Recovery Image

Next, you'll install a recovery image--a miniature operating system that you'll use later to flash the complete ROM. The recovery image will also come in handy for creating full backups of the device, among other things.
1. Copy the TWRP .img file into c:\kfu\software. At this writing, the latest TWRP image is named openrecovery-twrp-blaze-2.1.1.img.
2. Open a command prompt window at c:\kfu\tools and install the image:
fastboot -i 0x1949 flash recovery C:\kfu\software\openrecovery-twrp-blaze-2.1.1.img
3. Change the boot mode to Recovery:
fastboot -i 0x1949 oem idme bootmode 5001
4. Reboot into TWRP:
fastboot -i 0x1949 reboot
At this point, your command prompt should look like this:
Command prompt window after installation of recovery image.
And your Kindle Fire should look like this:
Kindle Fire screen after installation of recovery image.

Install a Custom Bootloader

You are well into the process now. Next, install the FIREFIREFIRE custom bootloader:
1. Take the FIREFIREFIRE Zip file and place it (still zipped) into c:\kfu\software. At this writing, the latest filename is called fff-u-boot_v1.4a.zip.
2. Copy FIREFIREFIRE into the Kindle Fire's /sdcard directory:
adb push C:\kfu\software\fff-u-boot_v1.4a.zip /sdcard/
3. On the Kindle Fire, press the Install button. Navigate to /sdcard if needed (you should already be there by default), and select fff-u-boot_v1.4a.zip.
4. Swipe to confirm. You should get a success message:
Custom bootloader success message.
5. Back up the stock OS so you can roll back to it at any time. In the root TWRP menu, select Backup, modify the options if you like (the defaults are fine), and swipe to confirm. Backing up will take a while, which is one of the reasons why starting the process with a full battery is so important.
Backing up the stock OS can take a while.

Flash the Ice Cream Sandwich ROM

You're almost there! Now you just need to copy the ROM and flash it. As noted at the outset, we used AOKP in our test runs, but different ROMs may have different flashing procedures. Read the documentation for the ROM of your choice.
1. Place the .zip files containing the ROM image and Google Apps into c:\kfu\software.
2. Push the ROM and Google Apps onto the device:
adb push C:\kfu\software\aokp_otter_build-38.zip /sdcard/ adb push C:\kfu\software\gapps-ics-20120429-signed.zip /sdcard/
3. In TWRP, select Wipe > Factory Reset. This will remove all existing files from the data and cache partitions, but it won't affect the /sdcard directory, which contains media files.
4. In TWRP, select Install. Navigate to the ROM .zip file that you placed on the device, tap it, and swipe to confirm. This will take a few moments:
Installing the Ice Cream Sandwich ROM.
5. Once that is done, tap the Back button in the upper right corner, and repeat the process with the Google Apps .zip file.
6. Tap Reboot System in the lower right corner, and boot into your brand-new Android 4.0 experience! If you wish, you can now remove the ROM and Google Apps .zip files from your device.
You should have a fully functioning Android tablet in your hands, so play around with it and let us know what you think. If you run into any problems during installation, share them in the comments below so that the community can pitch in and help you solve them. Good luck!

How to Maintain Your Android Phone

Posted by Unknown 08:38

Your Android phone is a powerful computer. But like any other computer, it won't run at its best without proper care and maintenance. If you've ever owned an Android phone, you probably noticed that it became slower after a few months of use than it was when you first brought it home from the store. There are several reasons for this phenomenon, and in this article I'll explain how to get your Android smartphone back into tip-top shape. You can accomplish a lot of what I'll be recommending here by performing a simple factory reset; but if you take that approach, you'll lose your data and have to reconfigure your phone. So instead, grab your Android phone and follow these steps to get it running like new again.

Clear the Cache

Android phone maintenance: Clearing the cache.
Have an app that's always crashing? Rather than force-closing or uninstalling it, try clearing its cache. This simple step will help resolve most of the issues that troublesome apps may be experiencing--and it won't create new problems, as forcing the app to shut down might. To clear an application's cache, open the Settings menu on your phone and click Applications. Then select Manage Applications and tap the app that's been having problems. Don't worry--all of your data and settings will remain intact; you're just getting rid of temporary files that may be causing difficulties.

Uninstall Apps

Check your app drawer for apps you don't use or need.
Even though it's my job to love apps (and I do love them), improperly written ones can cause all sorts of trouble for your Android phone. Built-in problems can range from storing critical data as a plain-text file in your memory card to sullying your notification bar with constant updates that can't be disabled.
Consider the official Facebook app: Opening it automatically turns on your GPS, in case you want to upload a photo or create a status update that shares your current location. That's fine and dandy, except that the app periodically forgets to turn off your phone's GPS once it's done using it, wasting precious battery power and leaving you scrambling for the nearest outlet. Even apps you aren't intentionally using may be running processes in the background that waste resources for no good reason.
Unfortunately, task killers are generally ineffective at combating this problem, so your only practical option is to open your app drawer and uninstall apps that you don't regularly use. Doing so will open up space on your phone for more music, videos, and pictures, and it will help reduce the number of apps that are running in the background.

Clean Out Your Memory Card

Cleaning out your SD Card may not boost your phone's performance, but it makes sense to remove any old or unused files that are just taking up space on the card. To identify the biggest hogs on your memory card, I recommend installing DiskUsage. This app shows you which files on your phone are taking up the most room, though you'll have to plug your phone into a computer or use a file browsing app (such as Astro) to delete the unneeded files.
DiskUsage shows you what's on your SD Card.
You should do this whenever you uninstall applications, largely because some apps leave folders of data behind when they're uninstalled. If your phone is rooted, you can download the SD Maid app to automatically clear out old junk files. SD Maid also lets you freeze or remove any bloatware that came preinstalled on your smartphone--so you can finally get rid of the annoying Blockbuster app that continually asks you for updates.

Root Your Phone

If you don't mind voiding your warranty, rooting can breathe new life into an ancient Android phone. We've described how to root your Android phone countless times in the past, so you can refer to one of those guides when you're ready to walk through the actual process. A rooted phone gives you complete control over your Android device: You can remove unwanted bloatware, install root-only applications, and even load custom ROMs that change the look and feel of Android on your phone.
Another benefit of rooting is that you no longer have to depend on your carrier for Android updates. While everyone else is waiting for their phone to receive Android 4.0, you can probably find a ROM for your phone that will give you a taste of Ice Cream Sandwich a few weeks or months before the update officially appears.
Rooting isn't without its hazards, however, and a serious mistake can render your phone unusable. In my opinion, though, the benefits are worth the risks, especially if you have an older Android phone; it's definitely an option you should consider if you aren't satisfied with your current Android situation.

Trying to decide between, say, the hot new Samsung Galaxy S3 and the iPhone 4S? How about the Amazon Kindle Fire and Google Nexus 7 tablets?
Sure, PC World's reviews can help tremendously, but sometimes it's nice to see a blow-by-blow comparison between the exact models you've narrowed down.
For that, head to Versus IO. This handy site lets you compare two mobile phones or tablets side-by-side, giving you not only an overview of their features, but also explanations as to what those features' advantages are.
Let's use the aforementioned S3-vs.-4S as an example. When you type in the names of those two models and click Go, you'll immediately see images of the two phones side by side -- a great way to see just how much difference there is between 4.8-inch and 3.5-inch screens. (Answer: huge difference.)
Versus IO also tells you how many reasons there are in favor of one model over the other. For example, the Galaxy S3 has 19 points in its "Pro" column, versus just 10 for the iPhone.
Scroll down and you'll see those reasons spelled out in impressively plain English. Under the Connectivity section for the S3, the description notes that it has an HDMI output, versus "no" on the iPhone, and explains why you'd care: "Video and movies can be watched on a TV with HDMI input."
On the flipside, the iPhone offers "Direct OS updates by OS vendor," which is important because "It can be updated directly by the OS vendor, so no need to wait until the manufacturer or network provider releases an update."
I think these kind of real-world explanations can be especially helpful to novice shoppers, who may not appreciate the differences between, say, a 40nm and 45nm processor.
Versus IO has more phones than tablets (the Barnes & Noble Nook series was nowhere to be found), and not every aspect of every device is factored in. Just because a phone has a bigger battery, for example, doesn't mean it has better battery life. And the site doesn't take pricing or carriers into account.
Still, for those who like to not only compare specs but also learn more about them, Versus IO is a great place to visit.

Printing anything from anywhere is no longer fantasy. In fact, it's often a necessity if using a smartphone, tablet, or laptop is an essential part of your daily workflow.
Cases in point: You receive a huge spreadsheet attachment on your smartphone, and need a way to view the document without squinting. Or you revise a PowerPoint deck just as your plane lands, and need to print it before you arrive at a meeting. Or maybe you’re just staying with family out of town, and need to print a boarding pass directly from your phone.
Whatever the case, wouldn't you like to send a print job to the printer you spot down the hall, or to a printer in an office superstore down the block? Or how about sending a document from San Francisco to your own printer back in Chicago?
Epson's iPrint app lets you print photos or documents, save to cloud storage, and more. 
Mobile printing technology makes all of this possible. Printers with wireless or Web connectivity can communicate far beyond a specific user or workgroup. And printer vendors, all too happy to help you keep printing, are rolling out solutions that use e-mail or cloud-based print servers as the backbone for sending print jobs. Big companies like Apple, Google, and HP have particularly well-developed technologies that address issues such as reaching older printers, or finding places to print when you’re on the road.

Get ready and set to print

Where and how you get started depends on how far you want to take your printing capabilities. You'll also have to consider three basic issues:
1. Find your printer, find your app: Your device and printer of choice need to find each other. Obviously, it's easy to set up mobile printing around your home or office, where you own or already have access to the printer. But what about when you must send a job to an unfamiliar printer? Luckily, checking a printer’s online feature sheet will tell you whether it supports a solution to cover your mobile device or situation. You can also visit the iOS App Store or Google Play to search for a mobile app from the company that makes the printer you want to use (conversely, you won't have much luck searching for these apps in the Windows Phone Store or Windows Store). And if you want to find printers in random places as you travel, apps can help you detect accessible printers—at places like office stores and copy shops that offer printing on the fly (for a fee).
2. Print prudently: Security is a big issue with mobile printing. You want to protect remotely printed jobs from being seen by prying eyes, and also protect your Web-connected printer from being accessed by unauthorized users—or even hackers. Simple wireless printing usually prints the job immediately, so you’ll need to be nearby to pick it up. If you’re sending to a printer that’s not immediately accessible, look for a solution that gives you a passcode and holds your job until you get to the printer and enter the code. If you’re part of a big company, your IT department may require you to stick with implementations that lie within protected networks.
3. Accept limitations: A major challenge with mobile printing is the lack of a reliable connection and an installed driver. Printer vendors have had about three years to work out the biggest transmission kinks, but it’s still possible that your print job will go astray, and you’ll have to resend it. More commonly, you’ll miss that driver when your print job comes out looking funny. While most mobile solutions will let you print Microsoft Office files, photos, and PDF files with decent results, formatting hiccups could include extra pages, cut-off pages, font substitutions, and odd scaling.

Mobilize your own printer

The easiest kind of mobile printing targets the printer you know: the one that's sitting in your home or office. If it’s on a wireless network, you can print to it directly from nearby. Conversely, if it’s connected to the Internet, you can use an e-mail-based sending app to print to it remotely. An office you’re visiting may even have a printer that you can connect to in one of these ways.
If you use an iOS device, you’re in luck: Major printer vendors—such as Brother, Canon, Dell, Epson, HP, and Lexmark—cover iOS devices through either their own app or compatibility with Apple AirPrint. AirPrint lets you print from an iOS device to any AirPrint-compatible printer that shares the same wireless network. Your iOS device will detect the printer and print to it. (If your printer doesn't support iPrint, the third-party FingerPrint app may help.) As with many direct-connect printing apps, you'll have little to no control over the details of your print job, but you'll usually get a decent, if not perfect, print.
Android devices, too, enjoy either a wireless app for direct printing from most printer vendors, or the benefits of Google Cloud Print. Google Cloud Print is notable for being brand-independent and for working with older printers as well as newer ones.
New Windows 8 devices don’t have much to work with yet, other than platform-independent solutions like Google Cloud Print and HP ePrint. Surface tablets, like devices using Apple AirPrint, will print to any printer on the same wireless network.
To use Google Cloud Print, an older printer needs to be connected to a Windows, Mac, or Linux PC that’s turned on and connected to the Internet. If you see the term “Google Cloud Print Ready” in your printer’s specs, that means it can connect directly to the Internet, skipping the computer intermediary. The sending device has to run Android or iOS and use the Chrome browser, and you have to have a Gmail account. A Print option will appear for printing Gmail attachments or files uploaded to Google Drive. You can also share your printer with friends or colleagues who have the same basic setup, either as individuals or as part of a Google Group. Not bad for an app that’s still officially in beta.
Google
When you connect to a printer or print service using Google Cloud Print, their names appear as destinations in the Chrome browser’s print dialog.

Find printers wherever you go

HP’s ePrint may be brand-specific, but it’s still the most mature mobile printing solution. It comes in enterprise as well as consumer flavors, and HP’s ePrint Public Print Locations let you print to machines at UPS Store and FedEx Office locations, as well as many hotels, airport lounges, public libraries, and other organizations. HP offers an ePrint app for iOS, Android, and BlackBerry devices that lets you locate accessible ePrint Public Print Location printers and send print jobs on the fly.
Widely deployed services like these show how you can remove some of the uncertainty from needing to print when you’re on the go, whether passing through a city or an airport. More office stores, airports, hotels, and even public libraries are adding printers that can be detected by mobile users. FedEx Office stores also accept Google Cloud Print jobs, if you choose “Print to FedEx Office” in the Cloud Print dialog box.
Your device app may be able to detect compatible printers in the area, or you may get access information from the airport-lounge manager or librarian. In most cases, after sending the job, you get back an access code to release the printout when you get to the printer. In most cases, you also pay a fee for the print.
And if you're really in a pinch, and a FedEx Office, Office Depot, OfficeMax, Staples, or UPS store is nearby, each of those brands will let you upload a document to the cloud (a website) for printing, then pick up the job in person at the store.
Mobile printing is being embraced in multiple ways by multiple vendors, but any attempt at uniform standards is still in its infancy. Nevertheless, it’s only a matter of time—probably less, rather than more, time—before it will feel natural to print to any printer that happens to be nearby without going through hoops such as installing a driver or plugging in a cable.

HAve A guD tiME...:)

Facebook announced last week that Timeline—its redesigned profile page—is becoming mandatory for all users. If you don’t switch to Timeline on your own, Facebook will do so for you within “the next few weeks.”
Facebook has been rolling out Timeline slowly since December, after first introducing it at its F8 developer conference in September. The project is one of Facebook’s most ambitious and significant redesigns to date, as it seeks to become your digital scrapbook with the capability to document your life from birth to present day, and revisit old posts more easily.
While not everyone is on board with Timeline, the switch is inevitable. Here’s our complete guide to Facebook Timeline, from making the switch to adjusting your privacy settings, in order to make the transition easier.

Getting Started: Facebook Timeline basics

To switch your profile to Timeline on your own, visit facebook.com/timeline and click the “Get It Now” button.
After you make the switch, Facebook will immediately send you to your new Timeline page. At this point, only you can see your new Timeline—all your Facebook friends will still see your old profile design.
From the day you choose to up update to Timeline (or from the day that Facebook switches you), you’ll have one week to make any changes you want—including deleting old posts, adding life events and more—before your new profile goes live for your friends to see. Or, if you’re ready to debut Timeline before the one-week period, you can click “Publish Now” to push it live.

Facebook’s Timeline feature will soon be mandatory for all users of the social networking service.

New features

There are a number of new features and components that you’ll discover once you switch to Timeline. Here are a few of the important ones:
Inline privacy controls: When you update your status, you’ll notice a drop-down menu that shows exactly who you’re sharing a post with: Public, Friends, Only Me or Custom. When you change this setting, it will stay how you set it for future posts until you change it again. You can also designate a status for certain lists.
Navigating Timeline: There are two easy ways you can revisit your past posts. First, you can choose a year by clicking it on the Timeline slider on the right side of your screen, then drill down by month. Or, you can start by clicking the option beside your name and next to the “Update Info,” called “Activity Log.”
Within your Activity Log you can sort your past posts by everything from only items you’ve posted, posts by others, comments, notes, likes, info updates and more. This comes in handy when you’re deciding what you want to keep on your Timeline. (For more on this, see the next section on privacy.)
Adding “Life Events”: Just above your inline privacy controls is a new option—“Life Event.” Just as you can share a status or photo with your friends, you can also fill in your Timeline by highlighting events from your past, such as previous jobs, family and relationships, location moves, travel and more.
After you choose a category to update, you’ll be brought to a form to fill in the details: the location, who you were with, the date, a backstory, photos and a privacy setting for who can see this life event.
Highlight what matters: As part of Timeline’s more visual interface, you’re able to denote which posts deserve more prominence and which are less important, which is reflected in the size of the post.
For example, if you want to highlight a new photo album of a vacation that you just updated, hover over the item and click the star icon. This will turn this item into a “featured post,” which means it’s more prominently displayed.
Similarly, if you want to hide a particular post from your Timeline—but not delete it entirely—hover over the post and click the pencil icon.

How to adjust your privacy settings

When you (or Facebook) migrates your account to the new Timeline, you’ll have one week to make adjustments to your past posts and privacy settings before your Timeline will go live for everyone to see. You can publish your Timeline yourself anytime within the seven-day waiting period.
It’s important to note that Facebook does not change the privacy settings of your old posts; it retains the privacy settings from when you originally posted it. That means that while today you may limit wall posts to just your “Limited Profile” list, posts from years ago could be “Friends only” or even public since the Limited Profile option did not exist at the time.
You have a few options when it comes to pruning old posts:
Make all posts friends-only: It’s possible that your past posts have varied privacy settings based on when they were posted. One way—the easiest of them all—is to use one of the blanket privacy settings: “Limit the Audience for past Posts.” You’ll find this option near the bottom of your Privacy Settings page.
If you decide to use this option, the content on your Timeline that you’ve shared with more than your friends—such as public posts—will automatically change to Friends only. With this setting, though, people who are tagged and their friends will still be able to see the post.
Limit the posts by others on your Timeline: Another way to hide past posts is to limit specific people or lists of people from viewing what others have posted to your wall. To do this, go to your Privacy Settings page, then select “Edit Settings” next to “How You Connect.” Select the drop-down menu next to the last item—“Who can see posts by others on your timeline?” and choose “Custom.”
In the box under “Hide this from,” type the names of the people or the lists that you want to exclude from viewing posts from others on your wall—for example those on your Limited Profile list. Then click Save Changes.
Use “Activity Log” to edit posts manually: On your Timeline, click the “Activity Log” button that appears under your Cover Photo (the large landscape picture). From here, you can use the drop-down menu in the top-right that says “All” to drill down to every type of post or event that has appeared on your wall.
From this view, you can see who currently can see a particular item by clicking on the gear icon next to the post. You can also click the circle icon next to that to either “star” it on Timeline, hide it from Timeline, delete the post entirely or change the date.

Beware of scams

If you’re not a fan of Facebook’s new Timeline, you’re not alone. In a CIO.com poll of more than 800 people, 88 percent responded that they dislike the new profile design. Unfortunately for them—and contrary to Facebook Pages and Groups popping up—there’s no hitting the rewind button to revert to the old profile.
These pages, which you can find easily by searching Facebook for the keyword “Timeline,” have attracted tens of thousands of people. They are generally entitled “Deactivate Facebook Timeline on your Profile” or “Deactivate Your FB Timeline” and are found under app, public figure, community, cause, website and organization categories.
They also have a number of characteristics in common: Most request that you “Like” its page before it reveals how to receive your old profile design, then it instructs you to click a cluster of “Like” buttons and a “Share” button; select a state or country; and choose friends to invite to the application or group.
Security experts suggest that you steer clear of these bogus pages. Generally, Facebook’s official Facebook page and its official security page are two good resources to check if you’re unsure about whether or not a page or meme is legitimate. On these pages, Facebook will post information about new security features, tips and rumors.

Facebook Timeline and the new apps

Along with Facebook’s announcement of Timeline in September, it also introduced a “new class of apps” that go hand-in-hand with Timeline. Last week, Facebook officially launched more than 60 of these new applications.
While Facebook hopes that these new apps will keep you on its site longer, you can expect another change, too: a lot more noise in your Ticker and News Feed,as well as an influx of over-sharing. To avoid this, there are a few things you can do.
Choose your settings before you download: Below the app summary information when you first choose to download an app is an option: “Who can see activity from this app on Facebook.” How you’ve set your default privacy settings—either public, friends or a custom setting—that will determine the automatic setting for all your applications, unless you change it.
If you’re interested in using an application but don’t want your activity broadcast to your friends’ News Feeds and Tickers, choose the “Only Me” option. While your activity will appear on your Timeline, no one else will be able to see it.
Adjust settings after downloading: If you’re not sure what your app preferences are or you want to adjust them, you can review them one by one from within your Privacy Settings page.
From the drop-down menu in the top-right of your screen, select “Privacy Settings” then choose “Edit Settings” next to “Apps and Websites.” On the apps privacy page, click “Edit Settings” next to “Apps you use”—this will show you all the apps that you have downloaded, and the privacy and permissions associated with them.
Here, you can remove the app if you no longer want it connected to your account. You can also preview what permissions the app has and remove certain ones (some are mandatory, which you cannot remove). The last option, “App activity privacy” will tell you who can see posts and activity from this app. If you don’t want Facebook to share your activity, change this option to “Only Me.”
Know how your friends share your activity: Your friends and other people you share information with can also share your activity with apps they use.
To prevent your friends from sharing your app activity with others on Facebook, go to “Privacy Settings,” choose “Edit Settings” next to “Apps and Websites” then “How people bring your info to apps they use.” Here, make sure the box next to “My app activity” is unchecked.
If your iPhone suddenly stops taking a charge, but everything else keeps working, there may be a fix. I know someone with firsthand experience of just such an issue, and can offer advice that may solve your iPhone’s charging problem.
Because I want to ensure that I don’t unintentionally void his warranty in print, I’m going to protect the anonymity of the individual at the center of this story, and call him Flex Riedman.
Earlier this week, Flex went out with a buddy of his for dinner at a local restaurant. During the course of the meal, a nearly-empty beer bottle was tipped—a tragedy unto itself—but things immediately got worse: Flex’s iPhone was on the table, and it soaked up some light lager.
But Flex’s 4S seemed none the worst for wear. He toweled it off with the portion of his napkin not covered in honey mustard, and continued enjoying his night out with his friend.
On his car ride home, Flex plugged the iPhone into his car’s dock connector cable and listened to music on the short trip home. At this point, the spilled beer’s contact with his iPhone was less than a faint memory, it was a nothing two-second incident out of a couple hours with good company and well-seasoned steak fries.
Time marched on; bedtime arrived. After checking on his kids using the iPhone as a flashlight, Flex plugged the phone into his bedside charger. The phone didn’t start charging.
Flex did what any of us would do: He unplugged the cable and plugged it back in again. Nada.
A speaker dock sits on Flex’s nightstand. He unplugged the iPhone and seated in the dock. Music started playing immediately. But still, the phone showed no indication that was plugged in. Not a warning that it couldn’t charge, just—nothing.
It was at this point that The Beer Incident came forward in Flex’s mind. “Oh drat,” Flex thought because this is a family publication. He looked inside his iPhone’s dock connector port to see if it showed the telltale red indicator of liquid damage. Mercifully, it didn’t.
But Flex saw no other detritus inside the dock connector port that could explain away the issue; no lint or other debris seemed be gumming up the works. He turned off the iPhone 4S and plugged it back in. An iPhone that’s charging successfully should power back on in this situation, but Flex’s didn’t.
He reached into his nightstand and grabbed his old trusty iPhone 4 and plugged it into the speaker dock to charge, figuring that if he needed a phone the next day, he should charge up the one that would allow him to do so. “I’m going to have to go to the Apple Store tomorrow morning,” Flex said to his wife as he turned off the light.
Sleep didn’t come, though. Flex was too agitated about his iPhone 4S’s dire circumstances. Despite his knowledge that the unchargeable iPhone had just 22 percent of its battery life remaining, he powered it on once again. Still no dice.
As a last-ditch attempt at fixing it himself–even, dare I say, a foolhardy attempt, given that he’d already tried turning the phone off and on again—Flex tried a genuine restart: He held down the Home and Sleep/Wake buttons until the iPhone powered off and the Apple logo reappeared. And seconds later, he heard that familiar, unmistakable metallic electrical quack, that one that signals an iOS device is charging. And he rejoiced.
And then he went to sleep.
The next day, the iPhone 4S was fully charged, and Flex has seen no charging problems since.
So what can we learn from Flex’s experience? Turns out, he’s not alone: Googling reveals others have solved their iOS devices’ inability to charge with a similar restart maneuver. Whether the beer or the fates were truly to blame is unclear, and certainly merely restarting an iPhone won’t cure severe liquid damage. But if your iPhone stops taking a charge, remember Flex and his small tale of personal victory, and hold down those two buttons until the phone restarts.

How to Deal With Tech Distractions...!

Posted by Unknown 11:37

Having trouble focusing on your work? You're not alone: The advent of smartphones, tablets, and Twitter has made staying connected to the flow of information seem seductively simple. All you have to do is leave your email inbox open in one tab, have Facebook or Twitter open in another, and set your phone to beep whenever you have an appointment to ensure that you stay productive without missing a single meeting or status update.
Yet chances are good that you aren’t as productive as you could be. For every timely email message you catch, or every insightful Twitter discussion you contribute to, you probably slog through 50 unimportant email missives or waste 20 minutes declining silly game requests on Facebook. Technology can be terribly distracting. With a few simple tips and tricks, however, you can trim the fat from your technological lifestyle and be more productive.
Even if you are meeting your productivity goals currently, eliminating unnecessary distractions will help you get more work done in less time, so you can spend those spare moments on something more fun and fulfilling. For example, any PC user can benefit from our guide to making your PC distraction-free; desktop computers are more powerful than ever, but with that power comes the responsibility to resist knocking off every 20 minutes to check your Twitter app or play a few minutes of Skyrim. If that responsibility sometimes weighs too heavily on you, consider downloading a no-cost, distraction-free word processor or Web browser, which can help you stay on track.
Or perhaps you have loads of self-discipline, but you find it difficult to ignore people on your social networks long enough to get any work done. Working in a high-tech industry without trying to stay on top of Facebook, Google+, Twitter, and half a dozen other social networks can be tough, but we have some advice to help you silence your social networks without missing any important updates.
Of course, the last source of distraction for most people is email. You need it to work productively with colleagues and to stay on top of your industry, but--believe it or not--you can actually ignore your email without losing your job. In fact, you’ll probably improve your productivity even more once you stop wasting time responding to low-priority conversations and obsessively checking your inbox for new messages. The trick is to sit down and figure out what’s important, and then set up an automated filtering system that ensures you receive email only when it’s necessary. Check out our in-depth guide for more information, and use your newfound productivity wisely!
With tons of desktop real estate and the processing power to run practically as many apps as you can open, staying focused on a single task while using your PC can be a challenge. Luckily, in recent years developers have created a number of new tools to help you establish a distraction-free workspace at home or in the office. These apps and tools hide unused windows and menus to help you focus on what's important and to be more productive.
Without the distraction of extraneous apps, windows, and notifications, you'll be able to work more productively and with fewer interruptions than you would otherwise. Here is our roundup of tools that will let you write, work, and even browse the Web while keeping distractions to a minimum.

Distraction-Free Word Processors

The movement toward distraction-free tools started with word processors, and it's easy to see why: Writing requires a lot of mental energy; and if your attention drifts to the other windows and apps open on your PC, you can lose focus. Several good, distraction-free writing tools are available tools to choose from. I've compiled a list of my favorites here, but you may also want to dive into the settings of your favorite word processor to see whether it offers an option to shut out extraneous notifications and toolbars. Many modern writing apps include a distraction-free full-screen mode as an optional feature--a simple setting that saves time and ensures that you can continue to use your editing software of choice.
If you're a Windows user looking for a clean, simple writing tool, consider the free Writemonkey. This app is great for getting work done, but so is Q10 (also for Windows). It's mostly a matter of personal preference, but I find that Q10's timer feature is especially useful when I'm trying to write on a strict deadline or when I'm following the Pomodoro method.
Writemonkey takes over your screen, ensuring that no outside distractions intrude on your work area. (Image credit: Writemonkey)
Mac users also have several distraction-free writing apps to choose from, including a handy app called WriteRoom that creates a full-screen word processor and hides all menus until you need them later. Though WriteRoom has updated over the years with a number of strong features (for example, there's an iOS version now that syncs well with the desktop app) it costs $10 in a field where most competitors are free.
Productivity-minded Mac users can try OmmWriter, a free, easy-to-use dedicated writing app.
I prefer OmmWriter for distraction-free writing in Mac OS X; not only does it help me focus and work more productively, but it also has a few customizable themes (more are available in the premium version of the software), along with some soft ambient noise tracks to help drown out any distracting outside audio.
Linux users and any Windows or Mac users dissatisfied with other offerings should take a look at the cross-platform FocusWriter, a great little full-screen text editor that supports themes and tabbed document browsing in addition to the usual hidden menus and keyboard shortcuts.

Distraction-Free Desktop Apps

There's no reason to limit your distraction-free work environment to writing tasks. Plenty of other great tools can eliminate distractions from your PC desktop so you can stay more productive.
As many Mac users know, lots of Mac OS apps commandeer the entire screen while running in full-screen mode in the newest iteration of Mac OS, Lion. The operating system's support for full-screen apps has made many of the Mac's most popular applications (including Final Cut, Photoshop, and other video/music/image editors) distraction-proof by default. If your Mac has Lion installed, be sure to check for a new Full-Screen App icon in the upper right corner of your application window. If you can, click that button to run your favorite app in a distraction-free work zone.
Not all apps will have full-screen support, however, and in any case you may have to run multiple windows at once. If so, you can still minimize distractions from other apps with the help of Backdrop, a handy app that lets you hide not just other applications but also your computer's desktop when you're trying to get work done in one particular tool.
Windows users may be interested in Ghoster, a free (donationware) utility that dims all of your windows except the currently active one, to help you stay focused. It won't actively block notifications from programs such as AIM and TweetDeck, but you can probably shut those down on your own if you need to get some serious work done.

Distraction-Free Web Browsers

Undeniably the chief cause of distractions and reduced general productivity is the Web browser. The moment you open your browser you're just a new tab away from hours of distraction; worse, most people need to stay connected at work and have a Web browser open for at least a few sites (email, server management, CMS access, and the like) for much of the day.
Luckily, you can download Google Chrome and use it to turn any website that you need to use into a distraction-free stand-alone app, so you can keep an eye on the websites you need for work without wandering off for hours in search of random articles on Wikipedia. Google Chrome's Application Shortcut feature creates a Website-specific browser that will open and run only the site you tell it to; all you have to do to is open the Google Chrome Tools menu (by clicking the wrench icon in the upper-right corner of your Chrome browser) and select Create Application Shortcut. Next, choose where you want Chrome to create the application shortcut, and you'll get a stand-alone app that will display only that one site.
Google Chrome can create site-specific application shortcuts.
Unfortunately, this feature only works for Chrome users running Windows or Linux on their PC. Mac OS X devotees looking for a site-specific Web browser should check out Fluid, a free app built for Macs that lets users create dedicated shortcuts for specific websites. The full version ($5) lets you unlock a few more productivity features, including the ability to add Fluid links to your toolbar so you that you can have a dedicated Wikipedia or GMail application.
It can be galling to admit how much time we waste during the workday; but with these productivity tools at hand (and a little bit of will power), you should be able to make any computer-related task the unchallenged focus of your attention.
HAVE A GUD TIME...:)
The built-in speaker(s) on your computer, smartphone, tablet, or iPod don’t do your audio justice, especially if you want to enjoy full, rich sound or share your music with people more than a few feet away. So along with good headphones (see our headphones buying guide), a new set of speakers is one of the most rewarding audio upgrades you can give your gear.
But if you've recently visited any store—local or online—that sells consumer electronics, you've likely been confronted by rows and rows (or screens and screens) of computer speakers, speaker docks, and the like, in many different sizes and at many different prices. Which do you choose? To help you find the right set—for yourself or your favorite gift recipient—here's the latest edition of our annual speakers buying guide, which includes both general shopping advice and specific recommendations.

What to look for when shopping

As you're browsing the aisles or webpages of your favorite stores, here are some tips to keep in mind.
Specs and sound quality
Put simply, you should ignore manufacturers' specifications, especially frequency-response numbers. No standardized testing methodology exists for speakers, so many vendors exaggerate specs—often laughably so—making them essentially worthless. With very few exceptions, you can't rely on these numbers to tell you anything about a system's audio quality. Instead, use your own ears: Try to audition speakers locally before you buy. While a store isn't an ideal environment for testing, it's better than nothing, and it can let you separate the good from the obviously bad.
When testing speakers, bring a variety of your favorite music and take your time. A quality system provides good balance between the treble (upper), midrange, and bass (lower) frequencies, producing full, rich sound while preserving detail. Be especially wary of systems where the treble detail or bass sounds especially prominent—some speakers exaggerate one or both these to stand out in a crowded store display. This is especially common with bass: Speakers that use small drivers—and this includes subwoofers with small-for-subwoofer drivers—simply can’t reproduce the lowest notes, so vendors often tweak speakers to emphasize upper-bass frequencies. This approach adds some punch, but it can also make the speakers sound boomy or thumpy—a trait that becomes fatiguing over time. If deep, controlled bass is important to you, you'll need speakers with relatively large woofers or a good-sized subwoofer. Otherwise, consider speakers that forgo the lowest frequencies altogether in favor of accurate sound across the rest of the audio spectrum.
If you can't audition a system in person, read reviews from sources you trust.
Computer speakers vs. docking speakers vs. wireless speakers
Will your new speakers be used mainly with a computer? If so, any set of standard "computer speakers"—a self-powered system you connect to your computer using a simple analog or digital cable—will work just fine; you just plug in and enjoy. Computer speakers also work with tablets, smartphones, and portable media players—you just connect a cable from the device’s headphone jack to the speaker system. (Some smartphone charging docks and cradles even have a dedicated audio-out jack that provides higher-quality audio than the headphone jack offers.) But there are other options, as well.
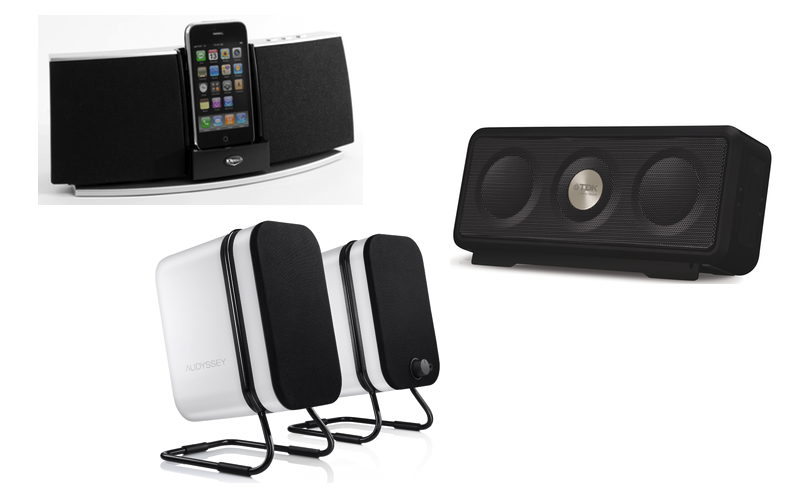
If you’re looking for speakers to be used primarily with Apple gear—iPhones, iPods, or an iPad—you may want to consider a system that includes a dock cradle featuring Apple's 30-pin dock connector or Lightning connector. The connector plugs into the port on the bottom of your device, letting the speaker system grab the highest-quality audio signal while simultaneously charging your player. (If the docking speaker system can run off AC or battery power, it likely charges your player only when the speakers are connected to AC power.) Some of these systems can also connect to your computer via USB, letting you sync your device with your computer while docked.
iOS devices released prior to the iPhone 5 in September 2012 use a 30-pin dock connector, while the iPhone 5 and subsequent devices use Apple’s new Lightning connector—make sure you buy the right kind of dock for your particular device(s). To use an older, 30-pin speaker dock with newer, Lightning-connector devices, you’ll need one of Apple’s Lightning-to-30-pin adapters or a third-party adapter.
A few speaker systems that include an iPad-compatible dock cradle are out there, but not many. If none are to your liking, but you want the charging/syncing capabilities and better audio quality that come with a docking system, you can use an adapter cable such as CableJive's dockXtender basic ($16) or dockXtender ($26)—plus the appropriate Lightning adapter, if necessary—to connect your iPad to any system with an iPhone dock. Keep in mind that most iPhone/iPod speaker systems will charge the iPad slowly, if at all.
CableJive's DockBoss lets you connect any source to a 30-pin speaker dock.
If you have a Windows Phone smartphone or an Android smartphone or tablet, speaker docks made specifically for these devices are few and far between, so I haven’t included any in this year’s list. However, you can connect Android and Windows Phone devices to any speaker system using a basic audio cable; CableJive’s DockBoss lets you connect these devices to a 30-pin iPhone speaker dock; and a Bluetooth speaker system—see the next paragraph—is always a solid option.
The third option, and the one that’s seen an explosion in popularity over the past couple years, is a wireless speaker system. Most of these connect using Bluetooth, a feature that’s quickly becoming pervasive, especially on mobile devices. Some use Apple’s AirPlay technology, which offers better range and audio quality than Bluetooth but works only with Apple devices. The big advantages of most wireless speaker systems are that you can use them with multiple devices and that you aren’t tied to a particular location—you can walk around with your phone or tablet, and control audio playback from a chair or desk on the other side of the room.
iPhone and iPad dock compatibility
If you'll be using a docking speaker system with an iPhone or a 3G- or LTE-equipped iPad, look for one that sports the Made for iPhone or Made for iPad logo. Such products were developed according to Apple's specifications, so they're more likely to charge your device properly and less likely to suffer from interference due to your iPhone or iPad's wireless circuitry when not in AirPlane mode.
Multiple devices and multiple inputs
Planning to use your speakers with both a computer and a tablet, smartphone, or other media player? Wireless speaker systems (more on these below) usually make it easy to use multiple audio sources—assuming most of those sources feature Bluetooth.
If wireless isn’t an option, many computer speakers have two inputs—you can connect an additional device to them by running an audio cable from the phone or tablet’s headphone jack to the speaker’s second input jack. Conversely, most speaker docks also have an auxiliary-input jack for connecting a computer or other audio source using a standard audio cable. (As noted above, there are also adapter cables that let you connect a computer to a speaker system that has only a 30-pin dock connector.) Make sure the speaker systems you’re considering include such additional inputs.
Especially for computer speakers, look for systems with the additional inputs located where they’re easily accessible, rather than inconveniently placed on the back of the speaker or on a subwoofer located under your desk. Also, when shopping for a speaker system to be used with multiple devices, consider where the speakers will sit: If you'll be doing a lot of listening at your computer, you'll likely want a system with separate left and right speakers—which usually means computer speakers. Otherwise, any design will do.
The controls and connections for Logitech’s Z523 are conveniently located on the right satellite speaker.
On-speaker controls for computer speakers
The most-basic computer-speaker systems have no controls of their own; you connect them to your computer and then adjust output volume using your computer. Look instead for systems that provide their own volume controls. Even better, many systems let you adjust bass and treble levels to fine-tune audio output for your particular listening environment. If the speakers you're considering include such options, be sure the controls are easily reachable—again, on the left or right speaker, or on a control pod or remote control, rather than on the back of a subwoofer that sits under your desk.
Price
To some extent, the more you pay for a set of speakers, the better the sound quality or the more features—or both—you get. Fortunately, speakers are among the most heavily discounted computer accessories, so be sure to shop around. Your budget may get you more than you think.

Speaker types and recommendations

In the sections below, I provide descriptions of each of the major types of stereo (left+right channel) speaker systems on the market. (I don't cover surround-sound systems.) For each type, I also provide a number of recommendations at various prices. For each recommendation, I indicate the audio-input options: analog-audio jack, optical connection, iPhone or iPad dock, Bluetooth, AirPlay, or USB. Prices listed are MSRP, so you'll likely be able to find each product for a lower price—sometimes substantially lower.
Of course, these recommendations are by no means exhaustive—many quality systems aren't listed. But you can’t go wrong with the models listed here, and they should give you an idea of the state of the art in each category.
Edifier’s Spinnaker e30
2.0 computer speakers
A 2.0 system (two channels but no subwoofer) usually comprises compact, left and right speakers, with the amplifier housed inside one of those speakers. By separating the left and right channels, a 2.0 system provides much better stereo separation and imaging than a one-piece system that confines the left and right speakers to a single enclosure. Most 2.0 speakers also take up very little room on your desk. However, because they tend to use small speaker drivers to keep their footprints small, 2.0 speaker systems rarely match a good 2.1 system (below) when it comes to bass response. Recommendations:
Ultralink’s UCube USB speakers
USB-powered 2.0 computer speakers
Although not as common as AC-powered models, some 2.0 speaker systems get their power from a USB port on your computer. In fact, these models use only a single USB cable for both power and audio—they grab a digital audio signal over USB—making them appealing to people averse to cords and cables. Some are also portable, making them convenient for laptop listening. But because a USB port doesn't provide much power, USB-powered speakers tend to be small, don't play very loud, and can't produce much bass—their sound quality is rarely as good as that of a similarly priced AC- or battery-powered speaker system. The ones listed here offer solid sound—for USB speakers, at least. Recommendations:
Audioengine’s Audioengine 5+
Studio monitors/powered bookshelf speakers
A variant of 2.0 systems, studio monitors are essentially powered bookshelf speakers. Considerably larger than most 2.0 systems, they generally give you much better bass response thanks to more-powerful (and better-quality) amplification and larger low-frequency drivers. They can play much louder, as well. In fact, a good set of studio monitors produces sound quality closer to that of a traditional home stereo system. On the other hand, studio monitors can take up a lot more room on your desk, and they sometimes sound better from across a room than when you're seated directly in front of them (called near-field listening). Professional studio monitors, often used in recording studios, can cost well over $1,000, but there are some great options at reasonable prices if you've got the room. Recommendations:
Note that most studio monitors are designed like traditional bookshelf speakers, with a flat base. This means that if you put them on your desk without a stand, they’ll project audio directly at your stomach or chest. Most can be wall-mounted to get them up off your desk and positioned at ear level. Alternatively, you can buy a set of inexpensive speaker stands designed specifically for using studio monitors on a desk; these stands are short but angle the front of each speaker upwards towards your ears. Some good options are the Audioengine DS1 (for small monitors; $29) and Audioengine DS2 (for larger monitors; $34).
Paradigm’s Millenia CT
2.1 computer speakers
A 2.1 system (two channels plus a subwoofer) typically uses even smaller left and right speakers than a 2.0 system. These speakers, called satellites, produce the higher frequencies, while a larger speaker/amplifier component, usually designed to sit under your desk, produces lower frequencies. (A 2.1 system is often called a subwoofer/satellite, or sub/sat, system.) The two big advantages of a 2.1 system over a 2.0 system are that you usually get much better bass response—both more impact and the capability to extend down to lower frequencies—thanks to the dedicated subwoofer, and the smaller left and right speakers take up less room on your desk (though the subwoofer/amplifier unit may take up a lot of room under it). Recommendations:
Jabra's Solemate
Portable speakers
If you want to be able to pack your speakers in your luggage, laptop bag, or backpack, you need something small, light, rugged, and battery powered. However, thanks to the smaller size and lower power of portable speakers, you'll sacrifice sound quality for such convenience. The majority of portable speakers can connect using a standard audio cable, but many recent models also support Bluetooth connections (see “Bluetooth wireless speakers,” below). Recommendations:
iHome’s iP4 Boombox
Transportable/boomboxes
Yes, the venerable boombox is back—a number of companies now make big, luggable sound systems that run off lots of big batteries (or AC power). But instead of cassette decks, they feature iPhone docks and Bluetooth. Think “portable but not packable”—and, yes, you can even carry them on your shoulder. Compared to truly portable speakers, these systems will give you better sound, more bass, and louder volume, albeit in a much larger and heavier package that won’t fit in your carry-on. Recommendations:
Brookstone’s Big Blue Studio
Desktop speakers and speaker docks
If you’re looking for something compact to put on your desk, the kitchen counter, a dresser, or a bookshelf, but you don’t really need portability, desktop speakers are the way to go. Thanks to AC power and larger-than-portable-speakers enclosures, these systems can offer surprisingly good sound quality, but they’re still compact enough to fit in small spaces. Some include an iPhone or iPad dock, and some even provide alarm-clock or radio features. A few offer battery-powered operation, which is convenient if you just want to be able to move your music from room to room, or take it to the backyard. (We haven’t yet tested any Lightning-connector speaker docks, so I don’t include any here.) Recommendations:
If you have an Android or other non-iOS smartphone or tablet, a few docking speakers are trickling out, but we haven’t yet tested any. For now, I recommend a system that features Bluetooth connectivity (see the next category).
Harman Kardon’s SoundSticks Wireless
Bluetooth wireless speakers
Bluetooth speakers let you cut the cord—or dock—between your audio source and your speakers. You can stream audio to stereo-Bluetooth (A2DP) speakers from any recent Bluetooth-equipped smartphone or tablet, including iPhones, iPads, and most Android and Windows Phone devices, as well as from many media players, including the iPod touch and iPod nano. Recent Macs and some recent Windows PCs also support stereo-Bluetooth streaming, and you can use Bluetooth speakers with other devices by purchasing a Bluetooth transmitter, offered by a number of companies. Most Bluetooth speakers also allow you to connect to non-Bluetooth devices using a standard audio cable. Because of this wide compatibility, Bluetooth is easily the fastest-growing category of speakers over the past year or two.
For convenience, some Bluetooth speaker systems provide Play/Pause, Back, and Forward buttons on the speakers themselves; most tablets and smartphones let you control music playback using these buttons. Some Bluetooth speakers also double as a speakerphone, letting you easily switch between music and voice features. Bluetooth speakers generally have a wireless range of around 30 unobstructed feet.
It’s worth noting that if you listen to high-quality music files and you have good ears, the sound quality of a Bluetooth speaker system is usually not as good as that of a similar wired system. (A new technology called Apt-X is helping to reduce this shortcoming. However, Apt-X isn’t yet widely supported, and you need Apt-X on both ends of your wireless connection—your Bluetooth source and your Bluetooth speakers.) Also, note that even though Bluetooth speakers connect wirelessly to your music source, the rest of the system isn’t wireless: For non-portable models, you still need a power cord, and for systems with left and right speakers or a subwoofer, there’s usually a cable connecting those components.
Bluetooth speakers come in all types—you may have noticed that I included a number of Bluetooth-equipped models in the various recommendation lists above. I provide a combined list here, noting the type of each speaker, for readers who are looking specifically for wireless options. Recommendations:
Libratone’s Zipp
AirPlay wireless speakers
Like Bluetooth speakers, AirPlay-enabled audio systems let you cut the cord, but they take advantage of Apple's AirPlay (formerly AirTunes) technology to let you stream music, from your iOS devices or Macs, over your local wireless network. (Some of these systems also include an iPhone/iPod dock.) The advantages of AirPlay over Bluetooth include better audio quality—AirPlay uses lossless audio compression, while Bluetooth uses lossy compression—and much better range, as you can stream anywhere within range of your Wi-Fi network. The biggest disadvantages of AirPlay systems are that you can use them with only Apple-branded sources, and that they tend to be quite a bit more expensive than comparable Bluetooth systems. Recommendations:

Build your own?

As an alternative to buying a speaker system, you can build your own system for your computer, smartphone, or tablet—even for Bluetooth or AirPlay listening. A few years ago, I wrote about building an iPod/iPhone speaker system from a small amp, a dedicated iPod dock, and a set of quality bookshelf speakers. Many of the components in that article are no longer available, but the how-to information is still relevant. More recently, I wrote about building your own AirPlay-enabled audio system, and we’ve also covered several desktop amplifiers. Going this route allows you to spend as much (or as little) as you like on whatever design and level of quality you prefer.
If you’re interested in this approach, we’ve got some upcoming articles you’ll want to watch for, including an article on adding Bluetooth to an existing speaker or stereo system; a roundup of desktop amps with a built-in digital-to-analog converter for getting quality audio from your computer; and an updated version of that AirPlay do-it-yourself article.

  • RSS
  • Delicious
  • Digg
  • Facebook
  • Twitter
  • Linkedin
  • Youtube